Direct Answer
To speed up WordPress, start with fast hosting, page caching, optimized images, and a lightweight theme. Remove unused plugins, reduce unnecessary CSS and JavaScript, optimize third-party scripts, use a CDN, and clean your database. Test your site before and after each major change with PageSpeed Insights or another speed testing tool to measure real improvements.
A slow WordPress website can frustrate visitors from the moment they open a page. Slow-loading pages, delayed images, and unresponsive buttons can cause visitors to leave before they read your content. A slow website can also make everyday tasks like publishing, editing, and managing your WordPress site take longer than they should.
The good news is that you do not need to rebuild your entire website to improve its performance. Hosting, caching, images, plugins, themes, scripts, fonts, and database settings all play vital roles. The key is finding the biggest problems first.
In this guide, you will learn how to speed up WordPress with practical steps that work for blogs, business websites, affiliate sites, and online stores. You will also learn how to test your site, improve Core Web Vitals, identify slow plugins, and check whether your changes actually worked.
| Heads up: Some of the links in this post are affiliate links. This means I may earn a small commission at no extra cost to you if you make a purchase. |
- How to Check Your WordPress Website Speed
- What Makes a WordPress Website Slow?
- How to Speed Up WordPress
- 1. Choose Faster WordPress Hosting
- 2. Use the Latest Supported PHP Version
- 3. Enable WordPress Page Caching
- 4. Use Server-Side and Object Caching
- 5. Optimize Your WordPress Images
- Do Not Lazy-Load Your Main Hero Image
- 6. Remove Unnecessary WordPress Plugins
- 7. Choose a Lightweight WordPress Theme
- 8. Minify and Optimize CSS
- 9. Optimize JavaScript
- 10. Reduce Third-Party Scripts
- 11. Optimize Fonts
- 12. Use a Content Delivery Network
- 13. Enable Browser Caching
- 14. Clean Up the WordPress Database
- 15. Limit WordPress Post Revisions
- 16. Review Autoloaded WordPress Options
- 17. Enable Gzip or Brotli Compression
- 18. Control WordPress Heartbeat and Background Tasks
- 19. Install Perfmatters
- 20. Disable pingbacks and trackbacks
- 21. Reduce External HTTP Requests
- 22. Disable Image Hotlinking
- 23. Avoid Loading Plugin Assets Everywhere
- 24. Optimize Embedded Videos and Iframes
- 25. Reduce Excessive Database Queries
- 26. Avoid Excessive Redirects
- 27. Optimize WordPress Cron Jobs
- 28. Optimize WooCommerce Websites
- 29. Optimize Elementor and Other Page Builders
- 30. Keep WordPress, Themes, and Plugins Updated
- How to Improve WordPress Core Web Vitals
- How to Find Which WordPress Plugin Is Slowing Down Your Site
- How to Speed Up WordPress Without a Plugin
- How Fast Should a WordPress Website Be?
- How to Test WordPress Speed After Optimization
- Final Thoughts: How to Speed Up WordPress the Right Way
- FAQ
How to Check Your WordPress Website Speed
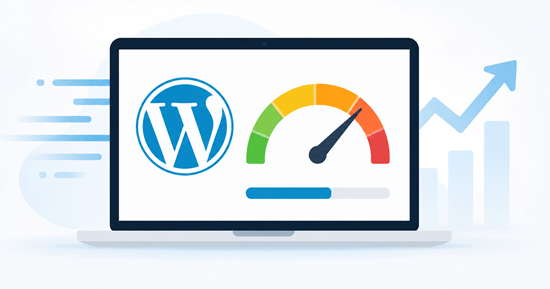
You need to test your website before changing any settings. This gives you a starting point for measuring your site’s speed. After making changes, you can run the test again and compare the results. This helps you see which changes actually improved your website’s performance.
Test your homepage and a few important page types. For a blog, this could include the homepage, a category page, and a typical article. For an online store, test a product page, category page, cart, and checkout. A homepage can load fast, while an article packed with images or third-party scripts remains slow.
Test With Google PageSpeed Insights
Google PageSpeed Insights can show performance data for mobile and desktop. Pay attention to the recommendations, but do not treat the score as the only goal.
Look at metrics such as:
- Largest Contentful Paint (LCP)
- Interaction to Next Paint (INP)
- Cumulative Layout Shift (CLS)
- Time to First Byte (TTFB)
- Total Blocking Time in lab testing
- Image and resource recommendations
Test With GTmetrix
GTmetrix can help you understand what happens during a page load. Its waterfall view is useful when you need to find large files, slow requests, third-party scripts, or resources that delay rendering.
Run several tests before making major changes. Network conditions may influence results, so a single test should not determine your entire optimization strategy.
Check Google Search Console
Google Search Console provides real-world Core Web Vitals information for eligible pages.
This data can reveal performance problems that a single page speed test may not show. A page may perform well on your computer but offer a poorer experience to visitors with slower connections or less powerful phones.
What Makes a WordPress Website Slow?
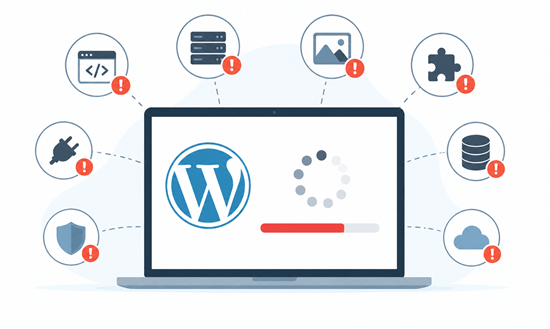
WordPress itself is not automatically slow. Performance depends on the entire setup around it. A website can become slower as you add plugins, images, tracking scripts, page-builder elements, advertising code, fonts, and database records.
The server also plays a major role. A site running on a crowded shared server may have a slow response even when its frontend is well optimized. WordPress’s official performance documentation identifies hosting, configuration, software versions, plugins, themes, images, caching, databases, and server resources as key performance factors.
Common causes include:
- Slow or overloaded hosting
- No page caching
- Large image files
- Too many resource-heavy plugins
- Bloated themes
- Excessive JavaScript
- Unused CSS
- Third-party tracking tools
- Poor font loading
- Database clutter
- Excessive autoloaded options
- Poorly configured CDN
- Outdated PHP
- Complex page-builder layouts
The important point is that you do not need to fix everything at once. Start with the issue that creates the largest performance bottleneck.
How to Speed Up WordPress
There is no single switch that makes every WordPress site fast. Performance comes from reducing the amount of work required to generate a page and reducing the amount of data a visitor needs to download.
The following steps are arranged in a practical order.
Start with hosting and caching, then work through images, plugins, CSS, JavaScript, fonts, database optimization, and delivery.
After each major change, test the site again. This approach helps you understand what actually improves your website.
1. Choose Faster WordPress Hosting
Your hosting environment provides the foundation for your website. If the server takes too long to respond, frontend optimization has a limit. A well-optimized theme cannot fully compensate for a server that lacks CPU, memory, storage performance, or sufficient PHP resources.
Look at the resources included with your hosting plan. Check CPU limits, RAM, storage technology, PHP workers, server location, database performance, and available caching.
If your website regularly reaches resource limits, upgrading the hosting plan may provide a larger improvement than installing another optimization plugin.
For a small blog, quality shared hosting may be enough. A growing content site may benefit from managed WordPress hosting. A high-traffic website may need a VPS or a more powerful infrastructure.
WordPress recommends considering hardware, server load, software versions, and the geographic distance from the server when evaluating performance.
Tip: Check your hosting account before spending hours optimizing small frontend details. A slow server can affect every page on your website.
2. Use the Latest Supported PHP Version
WordPress runs on PHP, so your PHP version can affect execution speed, compatibility, and security.
Check your current PHP version through your hosting control panel or WordPress Site Health.
If your host provides a newer supported version, test your website before switching.
Take a backup first. Then update PHP through your hosting account if your themes and plugins support the target version.
Do not update PHP blindly on a production website. Older plugins or themes may have compatibility problems. A staging website is useful for testing changes before applying them to your live site.
3. Enable WordPress Page Caching
Caching is one of the most useful ways to speed up WordPress. Without caching, WordPress may need to run PHP code, query the database, load plugins, and generate the requested page each time a visitor arrives.
A page cache stores a ready-to-serve version of suitable pages. The server can then deliver that cached output without repeating the complete WordPress processing cycle.
Caching is a high-impact performance improvement and covers plugin, browser, object, and server caching.
Popular caching solutions include:
- WP Rocket
- LiteSpeed Cache
- WP Super Cache
- W3 Total Cache
Your choice should depend on your hosting environment. For example, LiteSpeed Cache can provide strong server integration on LiteSpeed-based hosting.
Do not install several caching plugins simply because each one advertises a speed improvement. Overlapping optimization features can create conflicts.
4. Use Server-Side and Object Caching
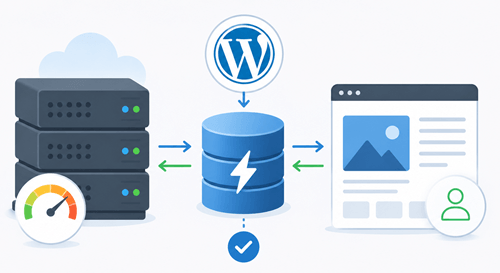
Page caching is only one part of the caching system.
Server-side caching can store generated content closer to the web server. Object caching stores frequently requested database results, so WordPress does not need to repeatedly retrieve the same information.
Persistent object caching can be useful for larger websites, membership websites, WooCommerce stores, and websites with complex database activity. WordPress explains that object caching can reduce repeated database work and improve server response times.
Redis and Memcached are common technologies used for persistent object caching.
Ask your hosting provider whether object caching is supported before configuring it. The correct setup depends on the server environment.
5. Optimize Your WordPress Images
Images can account for a large portion of a webpage’s total size. Uploading a 4,000-pixel photograph when the page only displays it at 800 pixels creates unnecessary work for visitors.
Resize images to a sensible display size before uploading them. Then compress them and choose a suitable format.
Modern formats such as WebP and AVIF can reduce file size while maintaining good visual quality. WordPress also supports responsive image handling, allowing browsers to select an appropriate image size.
For better performance:
- Resize oversized images.
- Compress images before or during upload.
- Use WebP or AVIF where suitable.
- Enable responsive images.
- Lazy-load images below the initial viewport.
- Avoid lazy-loading the main LCP image.
- Specify image dimensions.
- Avoid huge background images.
Optimizing your WordPress images can reduce page size and help your pages load faster. Resize large images, compress them, and use modern formats such as WebP or AVIF to improve performance without sacrificing image quality.
Do Not Lazy-Load Your Main Hero Image
Lazy loading is useful for content that appears farther down the page. Your main hero image may be a poor candidate for lazy loading because the browser needs it early.
Google’s LCP guidance recommends making the main LCP resource discoverable as early as possible. An image that is hidden behind JavaScript or lazy-loading logic can start downloading later than necessary.
6. Remove Unnecessary WordPress Plugins
Plugins add functionality, but they can also add PHP processing, database queries, CSS, JavaScript, and external requests.
Do not judge plugin performance purely by the number installed. A small plugin can be well optimized, while a feature-heavy plugin can create substantial work.
Review your plugins and ask:
- Do I still need this plugin?
- Does another plugin already provide this feature?
- Does it load assets across the whole website?
- Does it add frontend scripts?
- Does it create database activity?
- Is there a lighter solution?
Explore your website’s GTmetrix scan report to identify which plugins take a long time to load.

Visit the Waterfall tab and scroll through file names to check if any theme or plugin name is mentioned there. Monitor the timeline on the right side to analyze each of your plugins’ first paint and fully loaded time.
If it significantly slows down your page, replace it with another plugin to handle the job. Disable plugins one by one and test again. WordPress specifically recommends selectively disabling plugins when investigating performance problems.
Make sure that there are no inactive plugins left on your site. If any plugin is installed and you are no longer using it, remove it immediately.
Even inactive plugins will burden your servers and may diminish your page performance. Keep the number of plugins to a minimum to make your website run more smoothly.
7. Choose a Lightweight WordPress Theme
Your theme controls a large part of your site’s frontend structure. A theme with extensive animations, sliders, custom widgets, icon libraries, and extra scripts can create unnecessary page weight.
A lightweight theme gives you a cleaner starting point.
When evaluating a theme, check:
- Number of frontend scripts
- CSS size
- Font usage
- Page-builder dependency
- Template complexity
- Mobile performance
- Accessibility
- Update history
Do not choose a theme solely because its demo looks impressive. Demo pages can contain optimized images and carefully selected layouts that do not reflect how your own website will perform.
8. Minify and Optimize CSS
CSS tells the browser how your website should look. Large stylesheets can delay rendering when they include rules not required for the current page.
Minification removes unnecessary characters from CSS files. More advanced optimization can identify unused CSS and reduce the amount that needs to be processed.
Some caching and performance plugins provide options for:
- CSS minification
- Remove unused CSS
- Critical CSS
- CSS delivery optimization
Be careful when enabling aggressive CSS optimization. Test menus, forms, mobile layouts, buttons, popups, and other interactive elements after making changes.
9. Optimize JavaScript
JavaScript can create a bigger performance problem than a large image because it may need to be downloaded, parsed, compiled, and executed.
Review the JavaScript loaded by:
- Plugins
- Themes
- Analytics tools
- Advertising platforms
- Chat widgets
- Social media tools
- Page builders
- Embedded services
Use techniques such as minification, defer, and delay where they are appropriate.
Do not delay every script without testing. Some scripts are required for navigation, forms, e-commerce functions, or other important features.
The goal is not to eliminate JavaScript. The goal is to make the browser process only what the page actually needs.
10. Reduce Third-Party Scripts
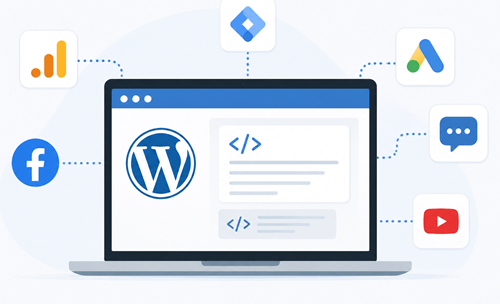
Third-party services can add useful functionality, but each service can introduce additional network requests and JavaScript.
Review services such as:
- Google Analytics
- Advertising networks
- Social sharing tools
- Live chat
- Heatmaps
- A/B testing tools
- Embedded social feeds
- Video players
For a digital marketing blog, you may have analytics, advertising, affiliate tracking, social widgets, and email tools running together. Review each one and remove services that no longer provide useful information.
You can also load tools only when needed. For example, a chat widget does not necessarily need to load immediately for every visitor.
11. Optimize Fonts
Fonts can affect both page weight and visual stability.
If your website loads several font families with multiple weights, the browser may need to download a large set of font files. A blog usually does not need ten font variations.
Keep your font setup simple.
Consider:
- Limiting font families
- Reducing font weights
- Using system fonts where suitable
- Self-hosting fonts when appropriate
- Using font-display
- Preloading only genuinely critical fonts
Avoid preloading every font. Preload is a priority mechanism, so excessive use can compete with resources that are more important to the initial page render.
12. Use a Content Delivery Network
A Content Delivery Network, or CDN, stores eligible content at locations closer to visitors. This will reduce network distance and help deliver static resources such as images, CSS, and JavaScript more efficiently.
A CDN is useful when your audience is spread across countries or continents.
Cloudflare is a well-known option, though your hosting provider may also offer CDN services.
A CDN does not replace WordPress caching. The two systems work together. WordPress’s hosting documentation explains that CDNs provide an additional caching layer and reduce network latency for visitors.
13. Enable Browser Caching
Browser caching allows visitors’ browsers to store static resources for a period of time.
When someone returns to your site, the browser may already have files such as CSS, JavaScript, images, and fonts. The browser does not need to download every resource from the server again.
Your hosting provider or caching/CDN system may configure appropriate Cache-Control headers for you.
Browser caching is particularly useful for returning visitors and websites with shared assets across several pages.
14. Clean Up the WordPress Database
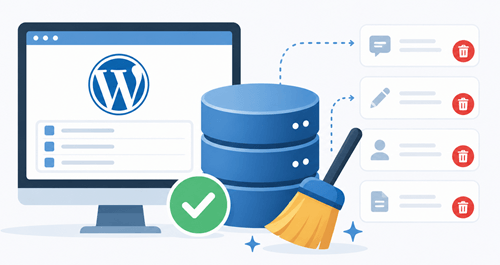
Your WordPress database stores information for your posts, pages, comments, plugins, themes, and other site features. As your website grows, it may collect data you no longer need. Cleaning up this data can keep the database manageable and reduce unnecessary storage.
Common sources of database clutter include:
- Old post revisions
- Spam comments
- Trashed posts and pages
- Expired transients
- Unused metadata
- Data left behind by deleted plugins
- Auto-drafts and temporary records
You can use a trusted database optimization plugin to identify and remove unnecessary data. Before running a cleanup, create a complete database backup. Some database operations cannot be easily reversed if something goes wrong.
Keep in mind that database cleanup is mainly a maintenance task. Removing a small amount of old data will not suddenly make a slow WordPress website fast. If your site has a large database or inefficient queries, however, regular cleanup can help keep the database under control.
For a large content website, check your database before deleting anything. Some plugins store important information in the database, and removing unfamiliar records can break features.
15. Limit WordPress Post Revisions
WordPress saves copies of your posts and pages as you edit them. These revisions let you restore an earlier version when you make a mistake or want to recover deleted content. They provide a useful safety net, but a site with frequent editing can accumulate many revisions.
WordPress does not set a fixed limit on revisions by default when revisions are supported. You can set a maximum number through the WP_POST_REVISIONS setting in wp-config.php.
For example, you can tell WordPress to keep the latest five revisions:
define( ‘WP_POST_REVISIONS’, 5 );
This does not delete revisions immediately. It limits the number WordPress keeps for future edits, while older revisions can be removed through a database cleanup tool.
Do not disable revisions simply to make your website faster. For most sites, revisions are not a significant cause of slow frontend loading. They become more relevant as a database maintenance issue, especially on websites with thousands of posts or frequent content updates.
Keep enough revisions for your editing workflow. If you publish and update content regularly, keeping five to ten versions may give you a useful balance between revision history and database management.
16. Review Autoloaded WordPress Options
Autoloaded options are settings that WordPress loads automatically during requests. Plugins and themes add these options to the wp_options table.
A large collection of autoloaded data will increase the amount of information WordPress must load for requests.
Keeping an eye on autoloaded options as excessive autoloaded data will hurt your site’s overall performance.
This is an advanced optimization, so do not delete options simply because they look unfamiliar.
Identify which plugin or theme created a large option first. Then check its documentation or remove the related software if it is no longer required.
17. Enable Gzip or Brotli Compression
Text-based files such as HTML, CSS, JavaScript, XML, and JSON should be compressed before being sent to the browser.
Gzip has been widely used for web compression. Brotli is a newer compression technology supported by modern browsers and web servers.
Your hosting provider or CDN may enable compression automatically.
Check your response headers or use a speed testing service to confirm whether compression is working.
Image compression is a separate issue. Compressing HTML does not solve the problem of a large JPEG, PNG, WebP, or AVIF file.
18. Control WordPress Heartbeat and Background Tasks
The WordPress Heartbeat API allows the browser to communicate with the server at regular intervals. It supports features such as autosaving and locking posts while someone is editing them.
On some websites, excessive requests may place unnecessary pressure on the server.
A performance plugin can help control Heartbeat activity, particularly in the WordPress admin area.
Do not completely disable it without understanding what your website uses it for. Editors, ecommerce functions, and other features may rely on background requests.
WP-Cron may also create background activity. High-traffic websites may benefit from configuring server-level cron jobs, depending on their hosting setup.
19. Install Perfmatters
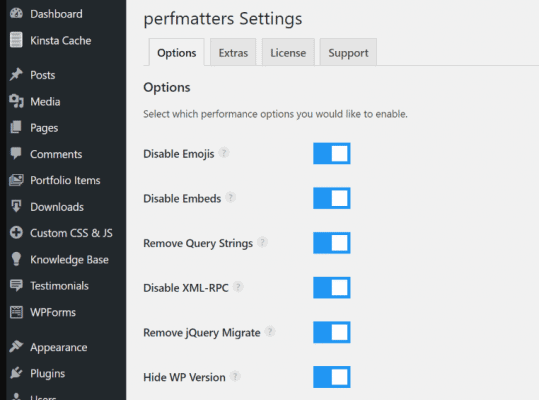
Perfmatters is an incredible WordPress plugin, developed by Kinsta hosting and KeyCDN. It lets you disable many unwanted features from your website to maximize its performance.
The plugin is lightweight and works with all hosting providers. These are the current features of the Perfmatters plugin,
- Remove query strings
- Disable emojis
- Disable scripts per page
- Disable and limit post revisions
- Disable embeds
- Remove shortlinks
- Change Hearbeat API frequency
- Disable Heartbeat API
- Change autosave interval
- Host Google Analytics locally
- Disable Google Fonts
- Disable pingbacks
- Lazyload images
- Change WordPress login URL
- Manage script loading for other plugins
- More
Perfmatters is tiny, weighing less than 50 KB. It is clean and helps you to score up to 100/100 in page speed tests. The plugin is high-quality but low-priced, costing just $29.95/year with a 15% renewal discount. It works best to skyrocket your website speed.
20. Disable pingbacks and trackbacks

When another website links to your content, WordPress can send you a pingback notification. You will see it in the WordPress admin area as a comment. Trackbacks work in a similar way, but the publisher sends the notification to your website when they link to your content.
Pingbacks and trackbacks can create unnecessary database activity and add more items to your comment queue. If you do not use these features, disabling them can help keep your WordPress site cleaner and reduce unwanted comment notifications.
To disable pingbacks and trackbacks, go to Settings > Discussion in your WordPress dashboard. Uncheck Allow link notifications from other blogs (pingbacks and trackbacks on new posts) and save your changes.
You can also control this setting for individual posts. Open a post in the WordPress editor, find the Discussion settings, and enable or disable Allow trackbacks and pingbacks on this page based on your preference.
WordPress can also create self-pingbacks when you link to another post or page on your own website. These notifications can add unnecessary activity when you use internal links. You can disable pingbacks to prevent these notifications from appearing.
21. Reduce External HTTP Requests
Your WordPress site may load files from services outside your own server. These requests can come from Google Fonts, analytics tools, advertising networks, social media widgets, chat tools, video embeds, and other third-party services. Each request can add some loading time, especially when a page needs to contact several external servers.
Start by checking which external resources your pages load. Tools such as PageSpeed Insights and GTmetrix can help you identify third-party requests. Look for services that your website no longer needs and remove them.
You can also reduce the number of external requests by limiting font families and font weights, removing unnecessary social widgets, and loading third-party scripts only when visitors need them. For example, a digital marketing blog may not need a social media feed to load on every article.
Do not try to remove every external request. Some services provide useful features or important tracking data. Focus on resources that add little value or create a noticeable performance cost.
22. Disable Image Hotlinking
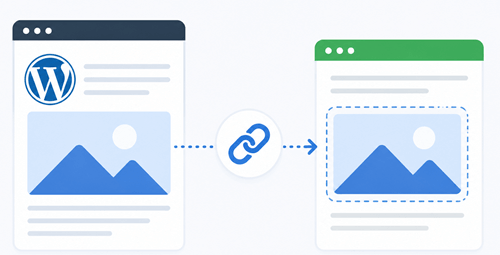
Image hotlinking happens when another website displays an image from your WordPress site using its original URL. When someone visits that other website, your server still delivers the image. This uses your hosting bandwidth even though the visitor is viewing the image somewhere else.
Hotlinking can become a problem for websites that publish original graphics, screenshots, infographics, or other popular images. A single image that gets embedded on several high-traffic websites can generate a large number of requests to your server.
You can prevent hotlinking through your hosting control panel, CDN, or server configuration. Some hosting providers offer a hotlink protection option that lets you block other websites from loading your images directly.
Before enabling hotlink protection, make sure you allow your own domain and any trusted domains that need to display your images. Also, test your website after making the change to ensure your images still load correctly.
For a small website with little image traffic, hotlink protection may not produce a noticeable speed improvement. However, it can help control bandwidth usage and prevent other websites from using your server to deliver their images.
23. Avoid Loading Plugin Assets Everywhere
A plugin can add CSS and JavaScript to your website even when a particular page does not use its features. This creates additional requests and causes the browser to process files the visitor may not need. Cleaning up these unnecessary assets can help reduce page weight and improve loading performance.
For example, a contact form plugin may load its files across your entire website even though you only display a form on your Contact page. An SEO tool, social sharing plugin, or pop-up plugin may also add resources to pages where they serve no purpose.
Review your website with PageSpeed Insights or GTmetrix to identify unnecessary CSS and JavaScript. You can then use a suitable asset management tool to prevent specific files from loading on pages where they are not needed.
Be careful when disabling plugin assets. A file that looks unnecessary may support another feature on the page. Test your menus, forms, buttons, popups, and other interactive elements after making changes.
24. Optimize Embedded Videos and Iframes
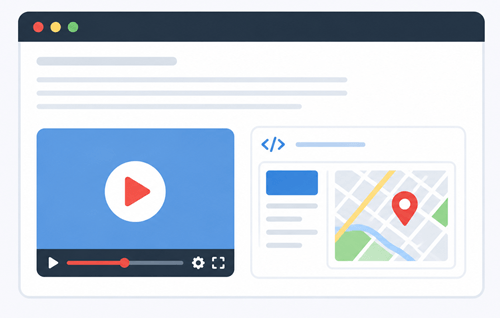
Videos can make your content more useful, but they can also add a lot of resources to a page. A YouTube embed, for example, can load scripts, images, stylesheets, and other files before the visitor even presses Play.
This can become a problem when you add videos to several blog posts. A page with three or four embedded videos may need to load a large amount of third-party content.
A simple solution is to use a lightweight video preview. Show a thumbnail with a Play button and load the actual video player only when the visitor clicks it. You can also lazy-load videos and other below-the-fold iframes.
The same approach works for:
- Google Maps
- Social media posts
- Podcast players
- Online forms
- External widgets
If you run a digital marketing blog, you might embed a YouTube tutorial inside an SEO guide. Loading the complete video player immediately can slow down the article. A click-to-load preview lets visitors read the article without loading the video resources first.
Priority: High. Video and iframe optimization can produce a noticeable reduction in page weight when your content contains several embeds.
25. Reduce Excessive Database Queries
WordPress uses the database to retrieve posts, pages, settings, user information, plugin data, and other content. A poorly optimized theme or plugin can run a large number of queries during a page request. These queries can increase server processing time and slow down page delivery.
You do not need to worry about every database query. Focus on queries that take a long time to complete or run repeatedly without a good reason.
The Query Monitor plugin can help developers and advanced users investigate database queries. It can show which plugins and themes are responsible for queries and highlight queries that take longer to execute.
For example, a poorly coded related-posts feature on a large blog could perform unnecessary database searches whenever someone opens an article. Replacing that feature with a better solution can reduce server work.
Database optimization becomes more important as a WordPress website grows. A small blog with a simple theme may not see a noticeable improvement from query optimization.
Priority: High for larger websites. This is worth investigating when server response time remains high after you optimize caching, hosting, images, and frontend resources.
26. Avoid Excessive Redirects

Redirects tell a browser to request another URL. A single redirect usually does not create a serious performance problem, but a long redirect chain can add unnecessary requests before the visitor reaches the final page.
For example:
old URL → another old URL → new URL
A cleaner setup is:
old URL → final URL
Review your redirects after changing your permalink structure, moving content, or migrating your website. Update internal links so they point directly to the final URLs.
You can use tools such as Google Search Console and website crawling software to find redirect issues. Check your .htaccess file or server redirect rules if you manage them yourself.
Do not remove redirects that protect important URLs. Redirects remain useful when you move content, change URLs, or permanently remove pages.
Priority: Medium. Fix redirect chains when they exist, but do not spend hours chasing a small number of normal redirects while larger performance problems remain.
27. Optimize WordPress Cron Jobs
WordPress uses WP-Cron to run scheduled tasks. These tasks can include publishing scheduled posts, checking for updates, processing plugin jobs, and running other background activities.
On a small website, WP-Cron usually creates little trouble. A busy website with several plugins can generate a large number of scheduled tasks, though. Some tasks may run during normal page requests and consume server resources.
Check your scheduled tasks if your server experiences unnecessary background activity. Plugins such as WooCommerce, backup tools, security plugins, and email systems can create their own scheduled jobs.
For websites with higher traffic, you can configure a real server cron job and disable WordPress’s normal request-based cron process. This requires access to your hosting control panel or server.
Do not disable WP-Cron without replacing it with an alternative method to run essential scheduled tasks. Scheduled publishing, ecommerce processes, backups, and other functions may depend on it.
Priority: Medium to low for smaller sites. Consider this optimization when your website has high traffic or a large number of scheduled tasks.
28. Optimize WooCommerce Websites
WooCommerce websites face additional performance challenges because product pages, cart functions, checkout processes, account areas, and dynamic requests can complicate aggressive caching.
Start with the basics:
- Optimize product images.
- Use quality hosting.
- Enable suitable page caching.
- Use object caching where appropriate.
- Keep WooCommerce extensions under control.
- Optimize database growth.
- Review third-party payment and tracking scripts.
- Exclude dynamic pages from inappropriate caching.
Do not cache pages such as carts and checkout pages in the same way as a static blog article.
If you run an online store, test the complete purchase process after every major optimization change.
29. Optimize Elementor and Other Page Builders
Page builders make website design easier, but complex layouts can generate additional markup, CSS, JavaScript, and frontend elements.
If you use Elementor, Divi, WPBakery, or another builder, keep layouts as simple as possible.
For example, a digital marketing article does not need several nested containers simply to display a heading and paragraph. Excessive layout elements can increase the page structure without adding value to the reader.
Review:
- Nested sections
- Unused widgets
- Animations
- Sliders
- Video backgrounds
- Global scripts
- Custom fonts
- Extra CSS
- Decorative elements
You do not need to remove your page builder. Clean up the parts of the builder that are not contributing to the page.
30. Keep WordPress, Themes, and Plugins Updated
Updates can include security fixes, bug fixes, compatibility improvements, and performance improvements.
Keep these components current:
- WordPress core
- Plugins
- Themes
- PHP
- Server software
Use a staging environment when your website has complex functionality. Test updates before applying them to a revenue-generating website.
Remove abandoned plugins when you can replace their functionality with a maintained solution. An outdated plugin can create security and compatibility problems even if it does not appear to affect your speed score.
How to Improve WordPress Core Web Vitals

Core Web Vitals give you useful information about real user experience. They cover loading performance, responsiveness, and visual stability.
Google currently uses three Core Web Vitals: LCP, INP, and CLS. It recommends aiming for an LCP of 2.5 seconds or less, INP below 200 milliseconds, and CLS of 0.1 or less.
You should not treat these numbers as a race to achieve a perfect PageSpeed score. Google recommends good Core Web Vitals for Search success and user experience, but good scores alone do not guarantee top rankings.
How to Improve LCP
LCP measures how quickly the largest visible content element becomes available.
Common LCP elements include:
- Hero images
- Large article images
- Main headings
- Featured content blocks
To improve LCP:
- Use faster hosting.
- Enable page caching.
- Reduce server response time.
- Optimize the LCP image.
- Avoid lazy-loading the LCP image.
- Reduce render-blocking resources.
- Make the LCP resource discoverable early.
- Use suitable image dimensions.
Improving LCP starts with helping your main content appear as quickly as possible. Optimize your largest image or text element, reduce server response time, and remove resources that delay the initial page load.
How to Improve INP
INP measures how quickly a page responds to user interactions.
A high INP can come from excessive JavaScript work. Large scripts can block the browser while it processes code.
To improve INP:
- Reduce unnecessary JavaScript.
- Remove unused plugins.
- Reduce third-party scripts.
- Break up long tasks.
- Avoid excessive page-builder elements.
- Keep interactive components lightweight.
If your blog contains a large number of scripts from advertising, analytics, affiliate tracking, and widgets, audit them carefully.
How to Improve CLS
CLS measures unexpected movement of page content.
A visitor may try to click a navigation link only for an advertisement, image, or other element to push the content downward. That creates a poor experience.
Common causes include:
- Images without dimensions
- Ads without reserved space
- Embeds without defined dimensions
- Web fonts
- Dynamically inserted content
Google lists images, ads, embeds, and fonts as common causes of layout shifts.
Set image dimensions and reserve appropriate space for advertisements and embedded content.
How to Find Which WordPress Plugin Is Slowing Down Your Site
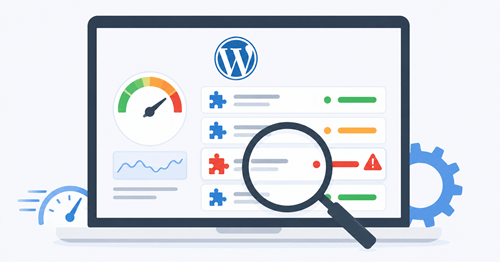
Plugin problems are difficult to spot because a plugin may slow down only certain pages.
For example, an SEO plugin may load functionality across your website, while an analytics plugin may add JavaScript to every public page. A form plugin may create extra resources only on pages containing a form.
Start by testing your site before making changes.
Then:
- Record your current performance.
- Disable one suspected plugin.
- Clear the relevant caches.
- Test the same URL.
- Compare the results.
- Check whether the website still works correctly.
- Repeat the process if necessary.
You can also use Query Monitor to investigate database queries, PHP errors, hooks, HTTP requests, and other WordPress activity.
Do not remove a plugin solely because it appears in a performance report. First, determine what it is doing and whether the performance cost is high.
How to Speed Up WordPress Without a Plugin
You can make substantial improvements without installing a speed optimization plugin. This approach is useful if you want to keep your WordPress installation lean.
Start with your hosting. A better server can improve response time without adding a WordPress plugin.
You can also:
- Upgrade PHP.
- Optimize images before uploading them.
- Choose a lightweight theme.
- Remove unnecessary plugins.
- Reduce third-party scripts.
- Use a CDN.
- Enable server-level caching.
- Configure browser caching.
- Clean the database.
- Optimize fonts.
- Reduce unnecessary page-builder elements.
Your hosting company may provide server-level caching, compression, CDN integration, and object caching. These services can reduce the need for several WordPress plugins.
How Fast Should a WordPress Website Be?
There is no universal loading time that every WordPress site must achieve. A simple blog article and a large e-commerce product page have different performance requirements.
Core Web Vitals provide useful targets. Google recommends an LCP of 2.5 seconds or less, an INP of 200 milliseconds or less, and a CLS of 0.1 or less. These thresholds are evaluated using the 75th percentile of page loads.
You should also watch TTFB, page size, request count, and JavaScript execution.
A website that loads quickly on a high-end desktop computer may feel slow on a mobile phone using a weaker connection. Test both device types.
Do not spend hours chasing a 100/100 laboratory score if your real users already have a good experience. Fix problems that affect real visitors first.
How to Test WordPress Speed After Optimization
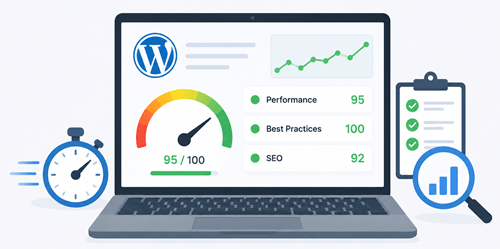
Testing after optimization is just as important as testing before optimization. You need evidence that a change improved the site rather than relying on assumptions.
Use the same page and, where possible, the same testing conditions.
Follow this process:
- Clear your WordPress cache.
- Purge your CDN cache if necessary.
- Test the same URL.
- Run several tests.
- Compare LCP, INP, CLS, TTFB, page size, and requests.
- Check mobile performance.
- Test important site functions.
- Monitor real-user data through Search Console.
Do not judge a change based on one number. A caching setting might reduce server response time while creating a JavaScript problem. An image optimization change might reduce page weight but have no noticeable effect if the image is below the fold.
Compare the new results with your original test and focus on real improvements in loading speed, responsiveness, and Core Web Vitals.
Final Thoughts: How to Speed Up WordPress the Right Way
Learning how to speed up WordPress is not about finding one magic setting, but rather about identifying where your website needs improvement.
Start with the foundation. Check your hosting, PHP version, and caching setup. Then optimize images, audit plugins, simplify your theme, reduce CSS and JavaScript, review third-party scripts, and improve your content delivery.
After that, look at advanced areas such as object caching, database cleanup, autoloaded options, and server configuration.
The most important habit is simple: test, change, and test again.
Do not make ten major changes at once. If you do, you will have trouble knowing which change helped or caused a new problem. Work through the biggest bottlenecks first and keep a record of your results.
A fast WordPress website is not just about getting a high score in a testing tool. It should load quickly for real visitors, respond smoothly when they interact with it, remain visually stable, and make your content easy to access.
That is the real goal of WordPress speed optimization.